
Fast film Click away
creative workshop
Hello Fast Film Click Away participants! I’m so excited to have you in this workshop in Chicago! We are going to have a LOT of fun and do lots of experimenting. You will be learning a few techniques you can use to make really amazing mixed media pieces. There are a few things you may need to do to prepare for what we are doing, so here is your little prep guide.
First, you do NOT need to bring anything! If you have a Polaroid camera, it would be AWESOME if you could bring it, as it will just help speed things along. This can be any kind of modern or vintage Polaroid camera that takes 600, iType, or SX-70 film. However, it is not necessary. I will have a few cameras and a Polaroid Lab to use and share around. The extra fees you paid should allow you each to have four or five Polaroid prints and all the materials you will need to create to complete a couple projects. We will be using iType and 600 film, so if you have an SX-70, you may want to bring your own pack of film, though I will also have that camera and some packs if you want to try it out.
We will be learning a couple things: transparencies and emulsion lifts in both color and black and white. These techniques are only possible with Polaroid brand film, not Instax. So if you have an Instax camera and you’d like to bring it, that’s fine! Just a heads up that these techniques do not work with that kind of print.
Transparencies take about 10-15 minutes, and emulsion lifts take between 15 and 30 minutes. In our 90-minute class, you should have time to make both!
Transparencies need to be done within 10 minutes of creating the print. That means you will either need to TAKE a photo to use, or you will need to PRINT a photo to use during class. You can print any photo on the Polaroid Lab. You will just have it ready on your phone. Black and white prints are MUCH easier to use for transparencies than color, which needs a blowdryer, gloves, and is unpredictable. So keep that in mind when think of what you might want to print or shoot.
Emulsion lifts are easier to do with fresh prints, but can be done with older prints as well. So if you have some Polaroids you’d like to use, bring them! Otherwise, plan to take or print photos for these as well.
WORD OF CAUTION:
These techniques are experimental! They don’t work the same way every time. I anticipate everyone being successful in their efforts, but please remember that there is no guarantee. I am also anticipating that there will be plenty of time for trial and error. So don’t worry, but also be patient and flexible.
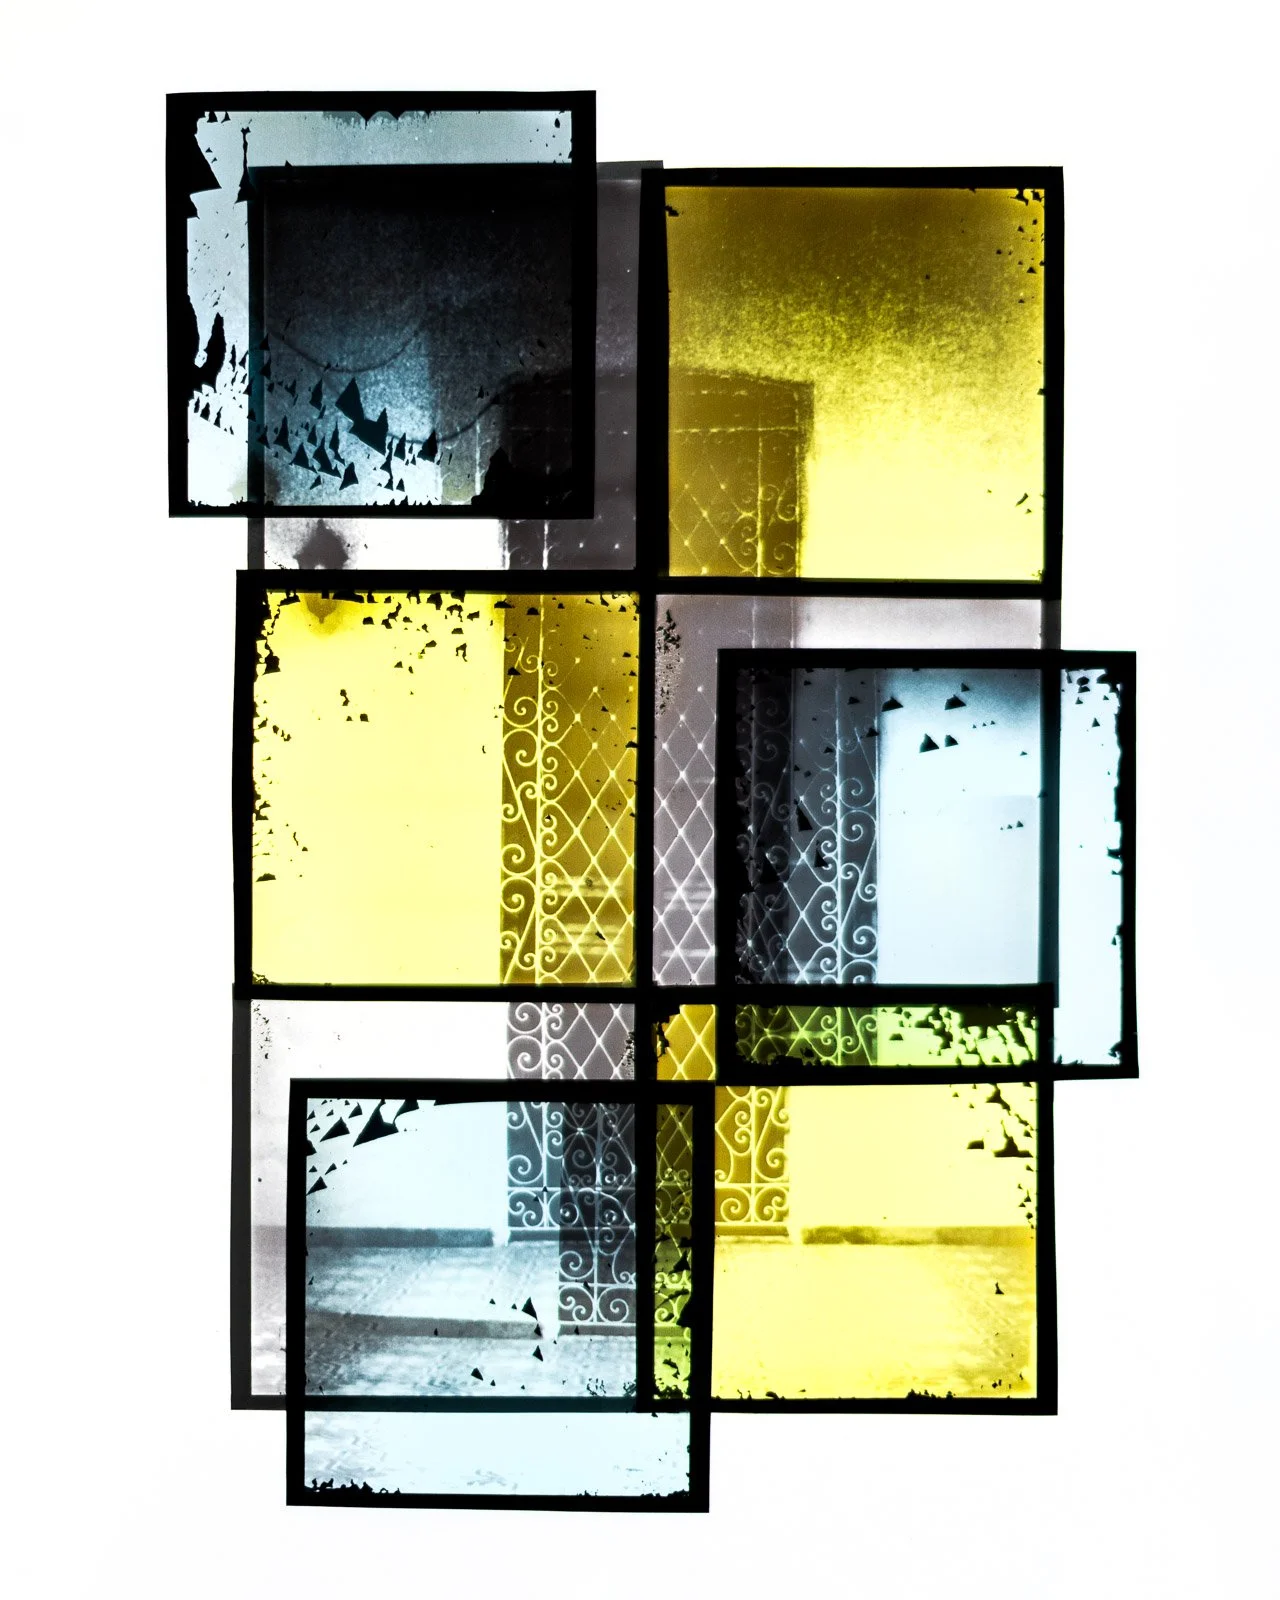
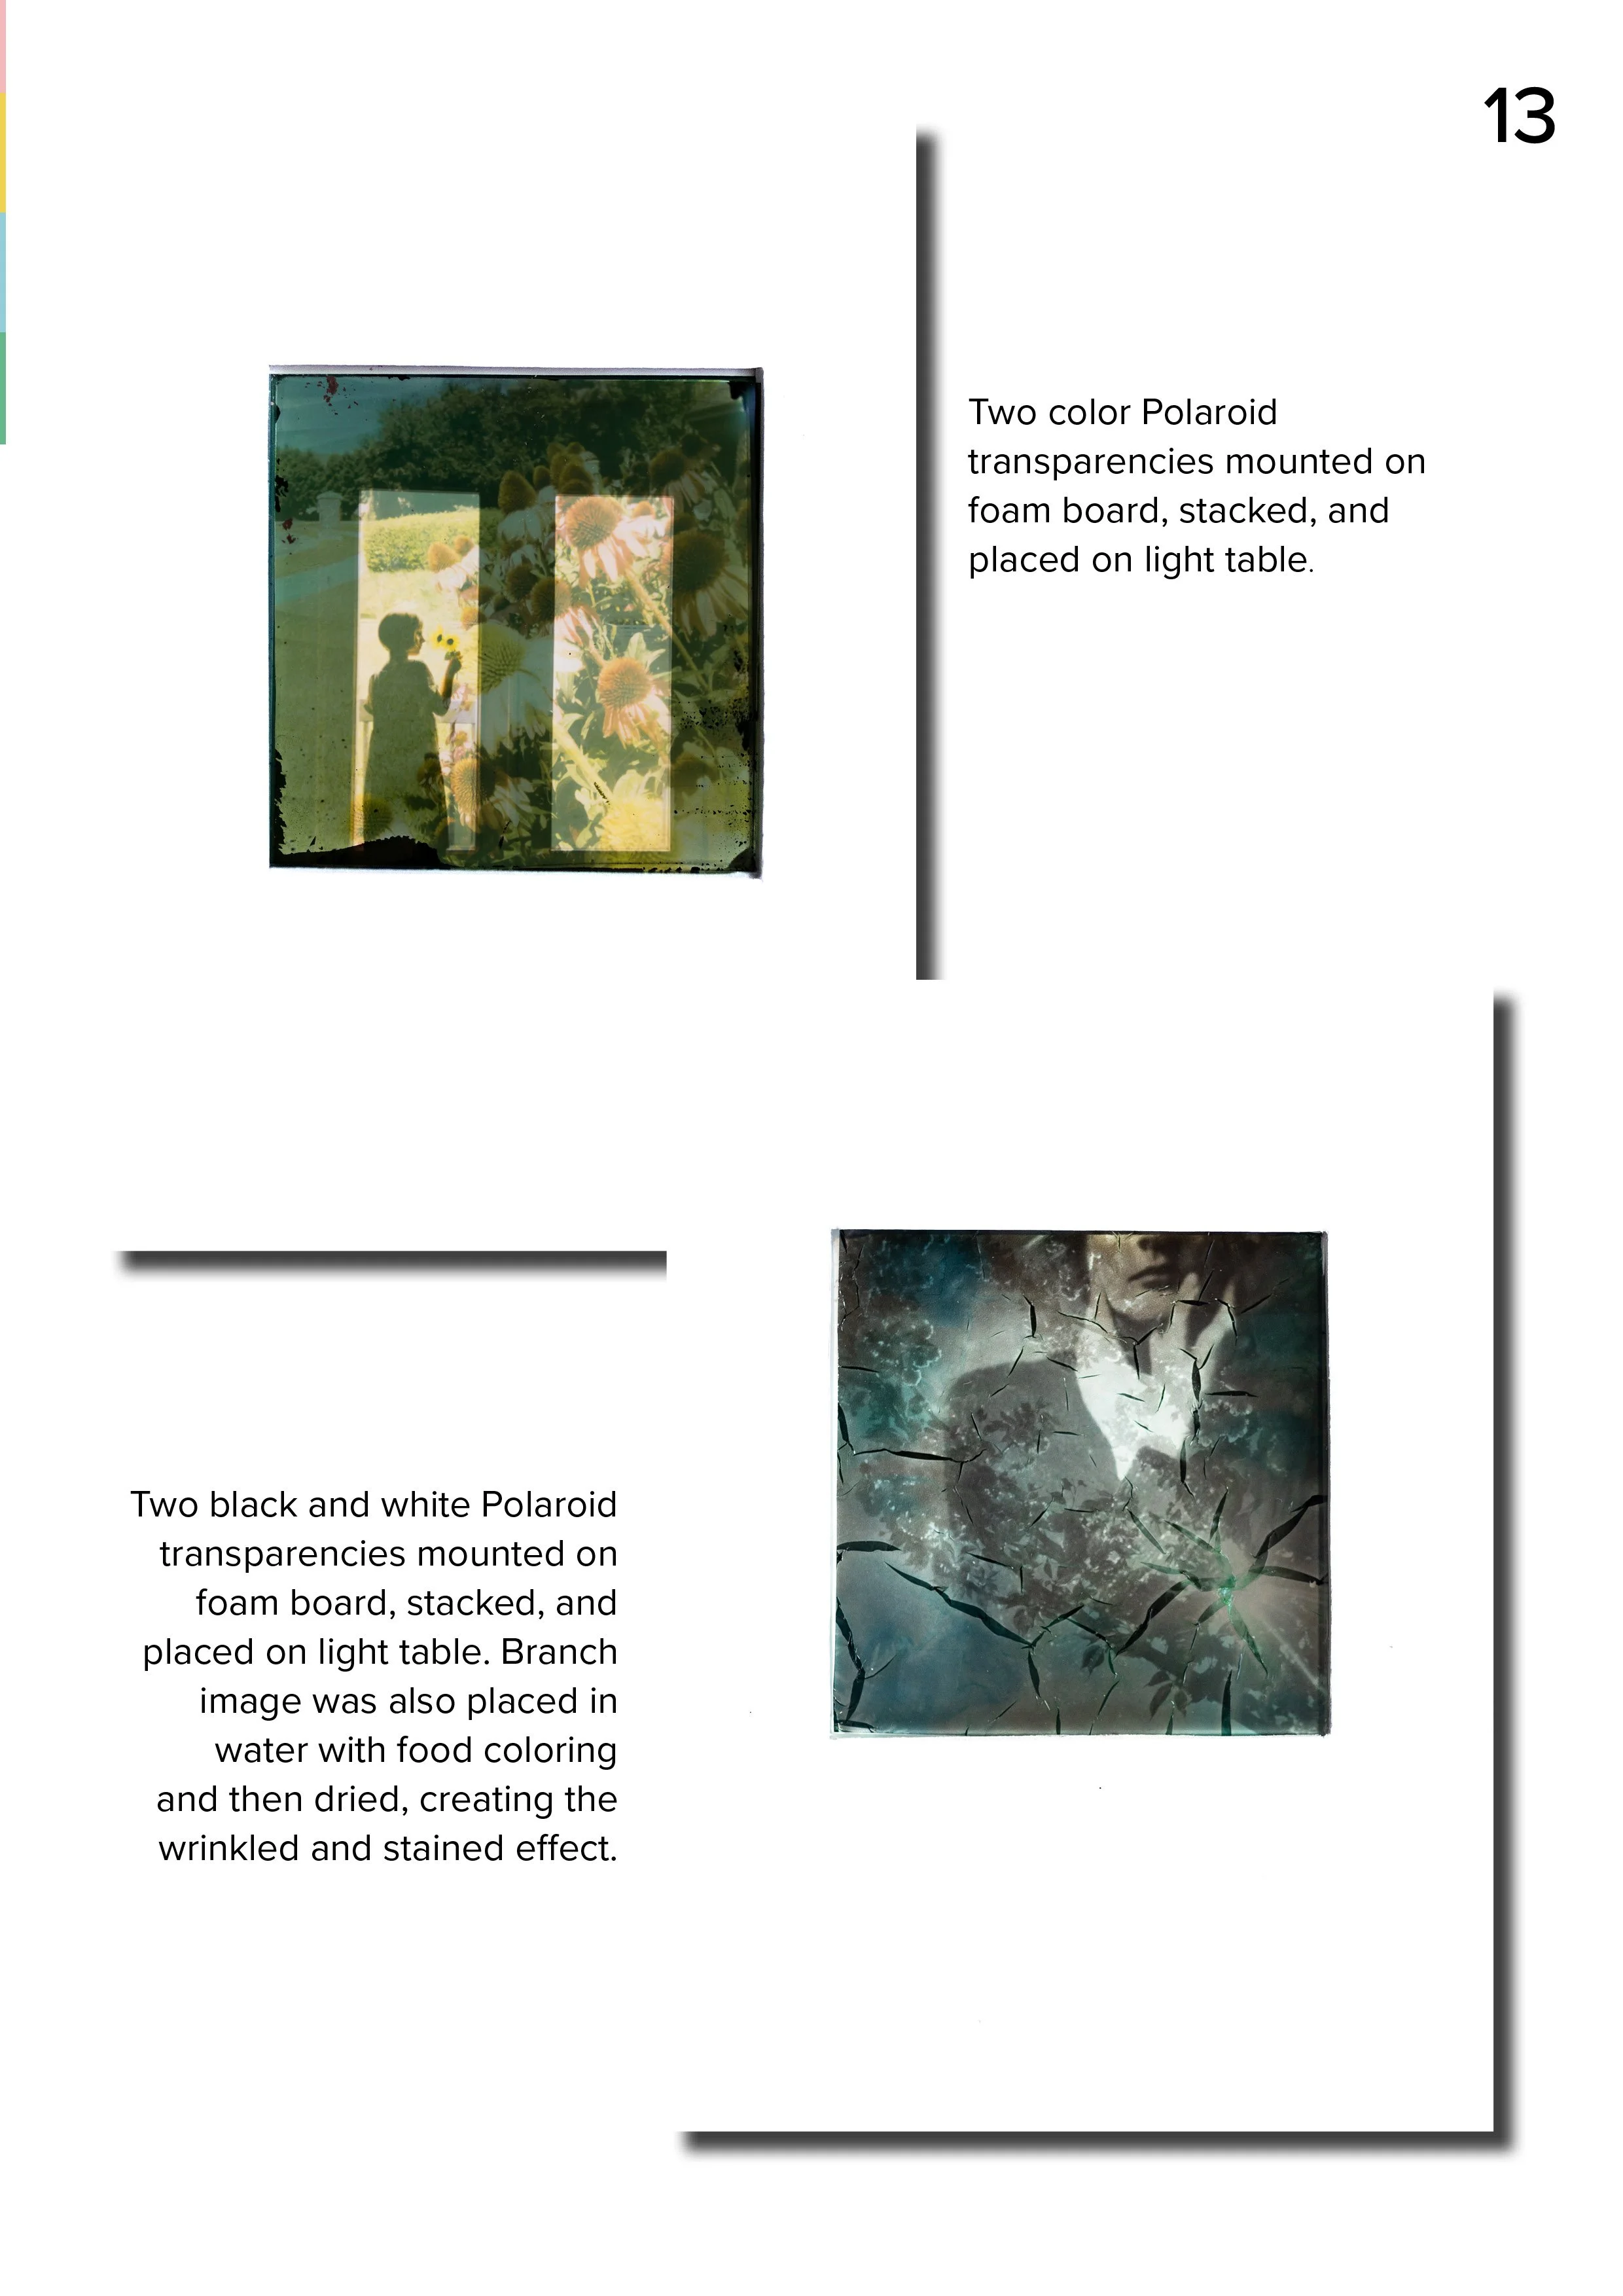
Transparency Examples (RIGHT)
Transparencies need a light source for best effect. We will just use the windows during our class. I like to mount my transparencies on foam board with windows cut out so i can create a little more depth as I layer the images. I will have foam board available for you to use.
Images that layer best are things like windows, textures, etc. Think of actual double exposures and what might work with those. We are basically layering images as doubles manually.
You don’t have to layer the transparencies perfectly or with foam board. Below is an example of layering flat and overlapping the images.
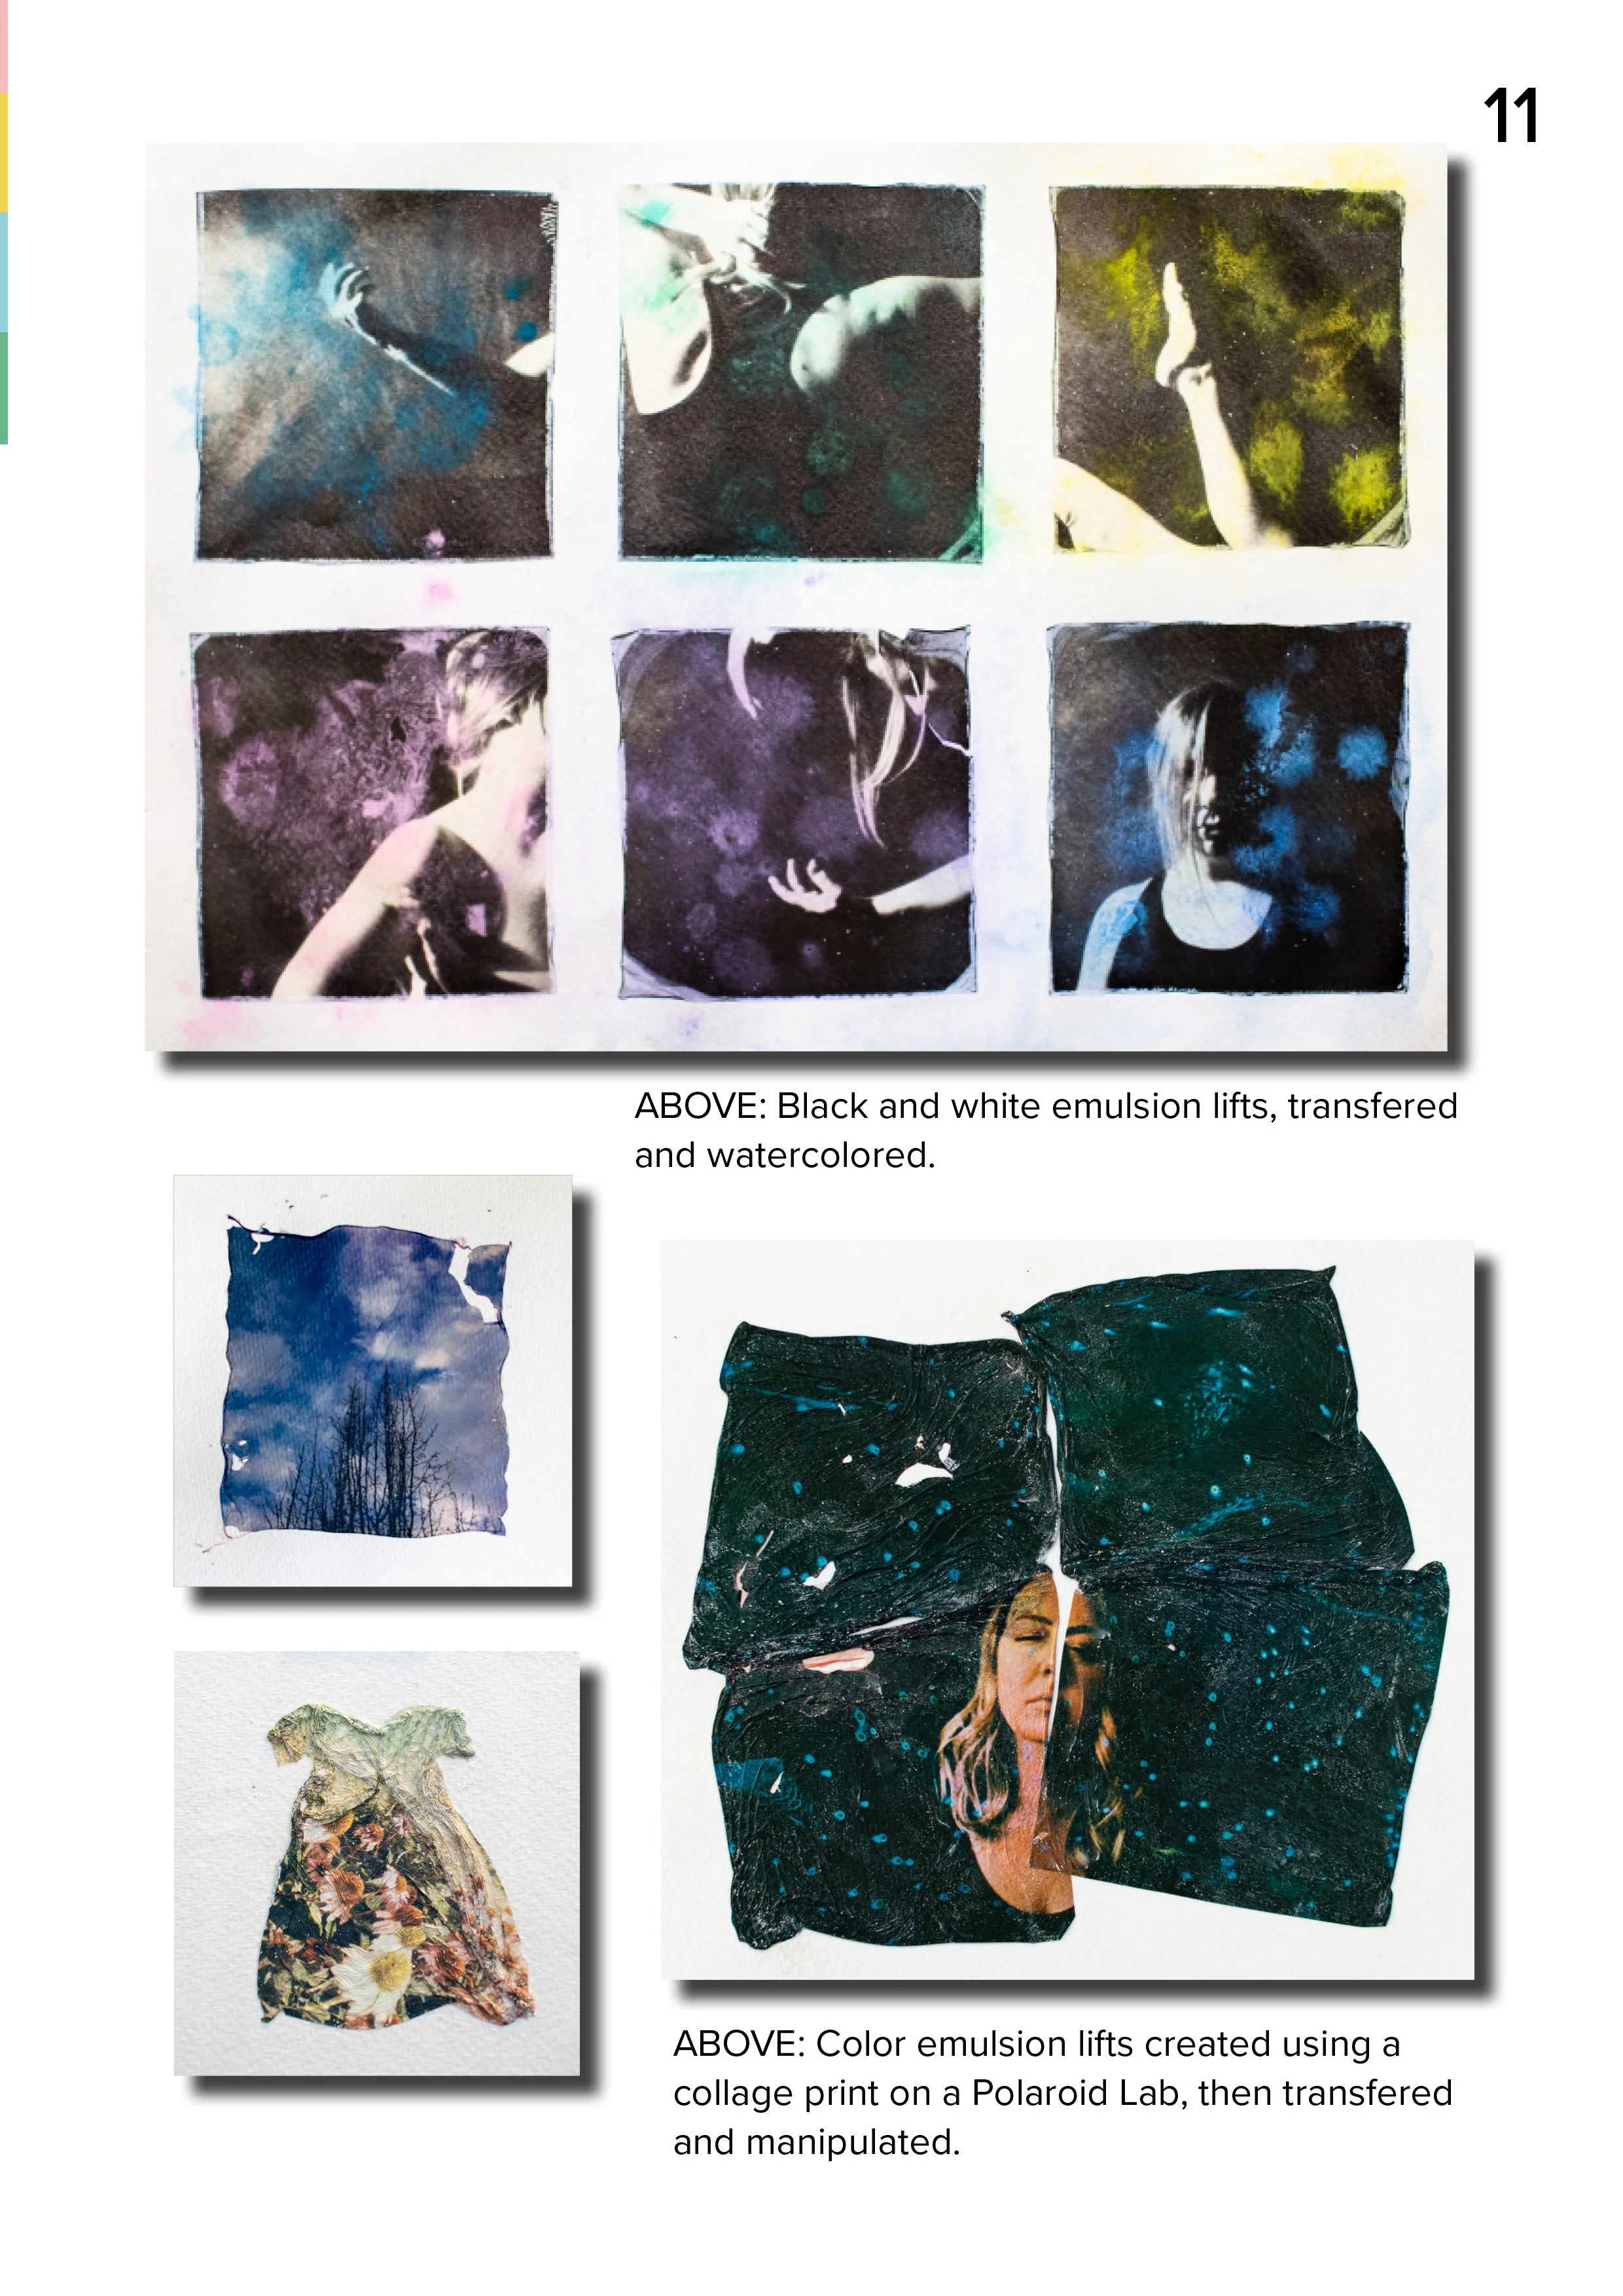
Emulsion Lift Examples (LEFT)
Emulsion lifts are most commonly transferred to watercolor paper. I have also used transparent surfaces like plexiglass or color gels, and even photo prints. I will have watercolor paper available for you to use, but you are welcome to bring another surface if you’d like. Smooth surfaces like plexiglass are a little harder to use just because they are slippery, but it can be done! Black and white emulsions are transparent when transferred to a transparent surface.
You can be totally creative in how you choose to manipulate your emulsions once you’ve transferred them. You can watercolor them (I will have some watercolors), you can shape them (I’ve done dresses and butterflies), or you can try to make them as clean as possible.
Preparation
All you need to prepare for class is an idea of what you’d like to create, any photos you think you may want to print ready on your phone (or you can send them to me at cami@bluehillimages.com and I will have them ready for you), and it might be helpful to download the Polaroid app on your phone as well for both printing and scanning purposes.
If you want any specialty film, like round frames, duochrome (like the yellow and blue ones I used in the project on the left), or any colorful frames, bring your own packs of film! Just make sure you don’t put them through the new heavy duty scanners at the airport. Have them hand-checked. :)
During the class I will explain the processes and show examples of what I can, but it would be helpful to watch these videos if you’d like to sort of see how it works:
BUTTERFLIES emulsion transfer and shaping.
PAINTED into a CORNER black and white emulsion project.
COLOR TRANSPARENCY reel on IG.
I don’t have a black and white transparency video handy, but you can watch this very nice dude on YouTube show you how HERE if you’d like, but I will also demonstrate that one in person for you as well! It’s by far the easiest one to do.
During the course, I will give you some of my tips and tricks, then we will spend the bulk of the time shooting/printing and working on our projects! I’ll be around to help you and answer questions along the way.
Please reach out on IG @bluehillimages or by email at cami@bluehillimages.com if you have any questions prior to Click Away.
SO EXCITED TO MEET YOU ALL!!!
Cami